Do you want to make your own unique bird fountain that’s super simple to put together? I discovered an easy way to set up a solar bird bath fountain with lights – using just 4 items. Read on for the instructions…
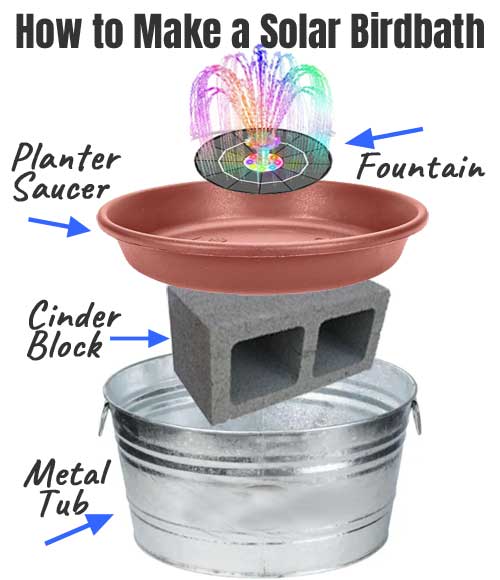
The key to doing this DIY project successfully is having the proper dimensions, so that the parts fit together. For example, the tub I used was 11″ tall, the concrete block 8″ and the saucer 3″ (8+3=11).
I’ve linked the components that I used below, so you can just copy what I did. However, you can also use different size tubs/pots and saucers using the same strategy.
1. Choose a Container for Your Bird Bath Fountain:
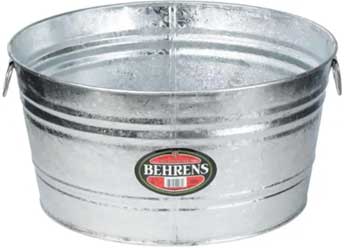
First, you want to select your main container. I used a large galvanized tub, but you can also use a flower pot, trough or other round container.
I chose a metal utility tub because I like the industrial look. However, it’s also really durable, mostly weatherproof and lightweight (which makes it easy to assemble).
Specs for the 15-Gallon Galvanized Tub:
- Dimensions: 23.25″ Diameter x 11″ Tall
- Approximately 20″ Diameter at Base
- Capacity: 15 lbs
- Weight: 5.5 lbs
- Material: Galvanized Steel
- Zinc-Coated Silver Finish
- Crack & Fade Resistant
- Manufacturer: Behrens
- For Sale: Where to Buy the Galvanized Tub
2. Get a Planter Saucer to Fit in Your Tub or Pot:
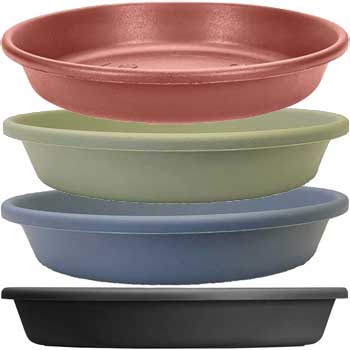
Second, get a planter saucer that fits the diameter of the top of your tub or pot. This will give your water fountain a more finished, streamlined look.
Yes, these trays are typically used to catch excess water drainage from flower pots. However, you can use them independently as a bird bath dish. The large size offers enough depth (3 inches) and width to hold multiple birds as well as a solar-powered fountain.
Although I like the depth of the bowl, you may not want to fill it all the way to the top. Smaller birds can’t stand on the bottom if the water is too deep, so filling the basin halfway can prevent problems and create a better bath.
I’ve also found this particular brand to be very durable, even though it only weighs about 1 pound. The heavy-duty plastic resin also resists fading and cracking.
You can get this saucer in a variety of sizes and colors, so it’s easier to find a good match fo the tub or pot you choose.
- Diameter: 21.13″ Across (other sizes available)
- Height: 3.625″ Tall
- Material: Plastic
- Color Options: Terra Cotta, Brown, Sea Foam Green, Black, Slate Blue
- Weight: 1.25 lbs
- Manufacturer: The HC Companies
- Made in USA
- For Sale: Where to Buy the Plastic Saucers
3. Elevate the Fountain Saucer with a Concrete Block:
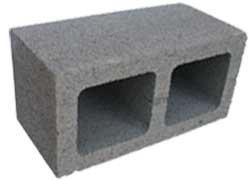
Third, find a sturdy strong object with a flat surface that you can place underneath the saucer to support it. (This will also elevate the saucer so that it sits near the top of the tub.)
I used an 8″ tall cinder block because it was easy, cheap and ultra-durable. It also fits the dimensions perfectly, so that the top of the saucer would sit at the top of the galvanized tub.
Last, put a solar bubbler in your fountain…
4. Installing a Birdbath Bubbler (in Sun or Shade!):
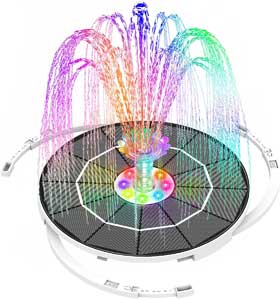
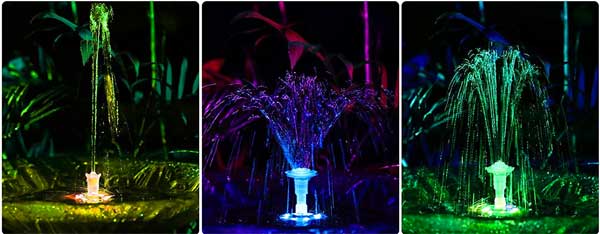
My favorite part of this solar bird bath is the birdbath bubbler. It contains solar panels, a battery-operated pump, a spray fountain and LED lights that come on at night.
Essentially, the unit runs on its own without you having to connect it to power or even turn it on. The sun powers the battery, which automatically turns on the fountain and the lights at dusk. Simply set it in the water bowl and let it run – it works at night as well as during the day.
In addition, the spray feature circulates the water to prevents mosquitos. Plus it works as a water aerator and mini mister for birds taking a bath.
All that said, this solar-powered spray fountain has a potential drawback. It will not operate without sunlight. Therefore, you need to set it up in a sunny location.
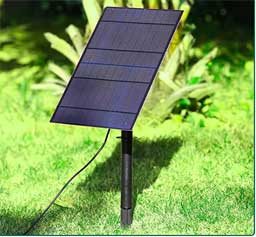
However, I’ve found an easy fix for this problem. You can use a bubbler with a separate solar panel instead of having the panels on top of the bubbler itself.
As a result, you can set up your birdbath in sun or in shade. Just position the panel in a sunny location (the connecting wire can extend 32 feet from the bubbler, so you have lots of placement options).
In addition, you can point the panel in any direction to receive maximum sunlight. Plus, you can angle it upwards or sideways.
Note: This fountain bubbler is slightly different from the first in its design and features. One of the big differences (besides the separate panel) is the power you get.
For instance, the first option has 5.5 watts and a 3000mAh battery, whereas the second version has 10 watts and has a 5000mAh battery. In other words, it has more power and battery life to keep the fountain and lights running longer.
My Summary, Review & Tips for Making Your Own Fountain:
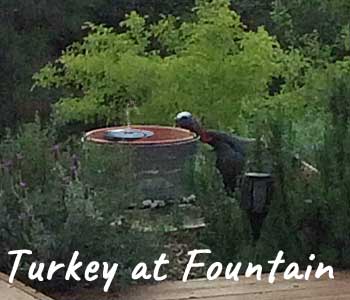
Overall, I’m really pleased with how my DIY fountain project turned out. It’s super low maintenance and attracts other animals like deer and turkey because it sits lower to the ground. (By the way, I also connected the water fountain to my existing drip irrigation system too.)
And as I mentioned above, you can use different styles of containers (ie. vintage, modern, classic, rustic, etc..). Customize your bird bath/water fountain to what you like – not something you could do with a traditional “kit”.
Has your fountain stopped working? This usually happens due to one of two things. First, the fountain pump may be clogged with debris floating in the water. Just spray it with water to clean it off. I also suggest using an algae/water clarifier to reduce these occurrences.
Second, if this happens early in the morning, the backup battery typically has not yet accumulated enough solar power to get going for the day. Just give it an hour or so.